Thursday, January 31, 2013

Tomato Paste

Tomato paste usually comes in a 6 ounce can. Each can contains roughly 6 Tablespoons of Tomato Paste - or about 1/3 cup. But, I almost NEVER see a recipe that calls for more than 2 Tablespoons.

SOOO

Being the frugal person that I am, I like to put whatever Tomato paste I don't use in a zippered plastic bag, and press it flat, and put it in the freezer.

When I need some, I just break off a piece that seems the right size, and toss it in the pot frozen.

It's a little thing- but it makes me happy not to let it mold at the back of the fridge.

This is being shared on Frugal Tip Tuesday

Wednesday, January 30, 2013

Stuffed Eggplant

Stuffed Eggplant
A blog called "stuffedveggies" HAS to have a few stuffed veggies on it, huh? This recipe is probably my personal favorite stuffed veggie. I first found it in a Greek-Cypriot Cookbook "Nistisimes Nostimies" (which translates something like "Delicious Lenten Food" if I understand correctly), and over time I modified the recipe quite a bit.


Eggplants cooking in Dutch Oven. I had some extra filling, and
extra space, so I filled a stuffed pepper and cooked it, too.
Stuffed Eggplant
Split and hollow out two large eggplants*, reserving pulp
Saute
A drizzle of water
Reserved Eggplant Pulp, chopped
Stir in
3 Cups Yachni Sauce
5 to 6 Cups Cooked Rice (leftover rice is great here!)**
Scant teaspoon Sugar
Scant teaspoon Cinnamon
Toasted, Slivered Almonds (a couple of handsful - to taste)***
Fill Eggplant shells with rice mixture
Place in Dutch ovens (or any similar pots with lid - I use two pots for 4 eggplant halves)
Pour a little water into the bottom of the pot, around the eggplants
Simmer gently, with lid, till eggplant is tender - about 45 minutes.

Sauteeing Eggplant Pulp
*Typical American Eggplants are about 1pound or 1/2 Kilo each - that's what I use. If you'd prefer something dainty and cute, use the more traditional little ones instead.

**Long Grain White Rice is traditional. I have also been happy with Short Grain White. Brown Rice is not traditional, and I have not tried it, but I have no reason to believe it wouldn't produce an acceptable, but slightly different, result.

*** Pine Nuts are more traditional
than slivered almonds - but since they went up to
$30 a pound, I quit using them. If you prefer to avoid nuts, I think water chestnuts would work well here.

If you have way too much filling, it can be frozen to make another meal another day. Or, you might choose to make the filling for the freezer, and simply fill the veggies on serving day.

If you prefer, these may be made in the slow cooker or Crock Pot. Simply cut the eggplant horizontally instead of vertically and fill. Pour about 1/2 cup water around filled eggplant, and cook on high for about 3 hours.

To fit your slow cooker, you may want to cut eggplant like this.

Hollow out each cup and place it in the crock.
 
Fill them, wedge them into the crock, and pour water around them.
I like to do peppers at the same time using the same filling -
I use my second slow cooker to cook them.
 
Stuffed Veggies ( Gemista ) fresh from the slow cooker.


Tip for dining with Omnivores: Cooked, Ground meat (pork, beef, or lamb) may be added into the Omnivore's portion before filling Eggplants. (Americans often like to add Feta to this sort of dish, but I've never seen this dish prepared that way in Cyprus - so it's your call)


To Hollow out Eggplants, cut around the perimeter with a paring knife
Then remove pulp with an Ice Cream Scoop (a large spoon, or even your fingers
will also work in a pinch)


Tuesday, January 29, 2013

Stuffed Manicotti

Stuffed Manicotti
This is a standby family favorite. I have served it many times, and I often find it is well received by Omnivores who don't have tofu as an everyday part of their diets.

Stuffed Manicotti
Stuffing:
Saute**
1 diced Onion (or 1/2 of a 12oz bag of Frozen Chopped Onion)
1 to 2 teaspoons Minced Garlic


Add:
Casserole Dish lined with thin layer of Spaghetti Sauce.
1 (10 to 12 ounce) package frozen, chopped spinach (thawed and drained and squeezed dry)
Mix:
1 (14 to 16 ounce) package firm tofu, mashed with fork (I prefer the refrigerated kind in plastic tubs to the aseptically packaged varieties)
2 Tablespoons Lemon Juice
½ teaspoon Salt
½ teaspoon Pepper
*Optional Mushrooms may be added, if desired
Above spinach mixture
Use mixture to fill one package UNCOOKED
Manicotti Shells, about 11-14 shells.
Place some
Spaghetti Sauce (store bought or home made)*
Tofu and Spinach Filling
in the bottom of an oiled casserole (the one you will use for baking).
Top with filled Manicotti Shells. COMPLETELY COVER SHELLS in Spaghetti Sauce. Cover casserole. Casserole may be frozen or baked at this point.  

Before baking, thaw 24 hours in refrigerator.

On baking day, COVER thawed casserole and bake for 45 to 60 minutes at 350degrees Fahrenheit, until heated through, and pasta is cooked.

(I use Glad Press & Seal for Freezing, as it is much more airtight than foil. But, I use foil for baking.)

Casserole Ready to Freeze or Bake.

Filled Manicotti Shells
*Spaghetti Sauce should be fairly thin for this recipe. If yours is very thick, you should thin it with water, till it resembles the normal store bought sauce consistency.
**Oil may be used for sauteing, but is not necessary. I usually omit it.

If desired, Bread crumbs may be sauteed in buttery spread (such as Earth Balance) with garlic salt to top casserole after baking. This adds eye-appeal and texture as well as flavour.

Serve with Garlic Bread or Toast and Salad.

Tip for Dining with Omnivores: This look-alike, super-easy to prepare Cheese Manicotti may be served alongside. (I'm indebted to this website for the no-boil method for my Manicotti dish : ) Alternately, Grilled Chicken may be served along side.

This is being shared at:
Empty Your Archive


Monday, January 28, 2013

Vegan Freezer Cooking Plan - World Tour Menu One

Pad Thai
Fasolakia Yachni
Menu for World Tour, Week One:
Sunday: Bulgur Pilaf
Monday: Chili Cornbread Casserole with Better Than Coleslaw.
Tuesday: Pad Thai
Wednesday: Fasolakia Yachni (Double Batch)
Thursday:  Family Favorite Lentil Soup
Friday: Black Bean Enchiladas, Chips, Salsa
Saturday: Lemony Dal


Cooking Plan for Week One:
Prepare:
  • Family Favorite Lentil Soup
    Combine Frozen Green Beans with One Batch Yachni Sauce in Freezer Container. This will be simmered in Slow Cooker on the day it is eaten (or, you may simmer it now if you prefer).
WEDNESDAY MENU DONE
  • Put Chili Ingredients in a Pot or Slow Cooker and start it simmering.  (Takes about 1/2 hour in pot)
  • Put Lentil Soup ingredients in a Pot or Slow Cooker, and start it simmering. (Takes about 40 minutes in pot)
  • Put Red Lentils & Water in a Pot and start simmering (takes about 30 minutes in a pot)
  • Keep an eye on the above three pots, stirring occasionally if needed, while you prepare the three items below. As they finish, remove them from the heat and allow them to cool.
  • Saute Flavour Packet for Lemony Lentils in a skillet. Set aside.
  • Saute Black Bean Enchilada filling in a skillet or pot, and set aside to cool.
  • Veggies to serve with Bulgur Pilaf
    Prepare Bulgur Pilaf in a large skillet, using about 1/2 batch Yachni Sauce, above.
  • Prepare Sauce for Pad Thai, and Shred Vegetables, Chop Onion. (if desired, you can buy in the produce department pre shredded Slaw vegetables & Pre Julienned Carrots)
  • Put Pad Thai Sauce and Veggies in Fridge.
TUESDAY MENU DONE
  • Better than Coleslaw
    Puree Red Lentils, and stir in Flavour Packet. Package and refrigerate or freeze.
SATURDAY MENU DONE
  • Package Family Favorite Lentil Soup, and freeze.
THURSDAY MENU DONE
  • Package Enchilada filling and Freeze (on Cooking day, fill tortillas & top with sauce, and chop salad for top.)
FRIDAY MENU DONE
  • Package Bulgur Pilaf and Freeze or Refrigerate.
SUNDAY MENU DONE
  • Chili Cornbread Casserole
    Package Chili and Freeze. Make Cornbread mix if you are using homemade and are out. (on cooking day, prepare cornbread batter and spoon over warmed chili & bake. Prepare Slaw)
MONDAY MENU DONE
Shopping List for World Tour week One:

2 12oz bags frozen onions
1 12 oz bag bag mirepoix mix
2 12 oz bags pepper & onion mix
Black Bean Enchiladas
1 10oz or larger bag frozen chopped spinach
2 pounds frozen green beans
1 bag frozen corn
4  15oz cans black beans
1  15oz can chickpeas
1  15oz can kidney beans
2 4oz cans mushrooms
5 cans chopped tomatoes
2 #10 cans chopped tomatoes
1 6oz can tomato paste
1 packet bulgur (2 cups needed)
1 packet red lentils
1# green lentils
1 bag cut vermicelli (3 oz needed) or equivalent spaghetti
1 packet rice noodles (approx. 1#)
1 container cornmeal
1 packet bouillon cubes
1 cabbage  (or Two Packages pre-Shredded Slaw veggies)
a few fresh tomatoes
Lettuce
Scallions
1 bag carrots (Also, consider Julienned Carrots for Pad Thai)
1 bag baked Corn Chips
1 packet firm tofu (optional)
1 packet tortillas
1 Container Salsa (if you don't have homemade on hand)
Chopped fresh veggies for bulgur (peppers, cucumbers, tomatoes, onion)
 1 can black olives
Roasted Peanuts or other nut as desired for slaw.
Also: Fresh Seasonal Fruit for Desserts, Salad Fixings, and Bread or Bread Ingredients.


Check Pantry for these Pantry Staples:

Bay leaves
Fresh jarred garlic
Sugar
Salt
Pepper
Olive Oil
Taco Seasoning
Flour
Baking Powder
Tapioca Starch
Applesauce (optional)
Dry Mustard
Dry Ginger
Fresh Ginger (dry may be subbed)
Turmeric
Whole Cumin
Cayenne
Lemon Juice
Lime Juice
Soy Sauce
Brown Sugar
Sesame Oil
White or Apple Cider Vinegar
Celery Seed
Sriracha (other hot sauce may be subbed)

Tips:

It is best & safest to cool items in fridge before putting them to the freezer. If that isn't possible, be sure to avoid making a big block of non-frozen food all together where cold air can't get to it and cool it down.

If you plan to eat the menu in the next two or three days, you may choose not to freeze it at all.

Each night, around dinner time, take the next day's dinner out of the freezer, and put it in the fridge to thaw.

Consider doubling things like Red lentils, flavour packets, chili, etc - to use a different way a different week.

Making a big batch of bread is an added plus and takes only about 10 minutes to get started - if you don't have time today, it can easily be done in a large batch on a different night. I try to keep several loaves & variety breads, like Naan, on hand in the freezer.

This is being shared on
Menu Plan Monday
Mangia Monday


Saturday, January 26, 2013

Apple Cinnamon Muffins

Vegan Apple Cinnamon Muffins from your Own Mix
Here's another toasty muffin that you can whip up from your own mix. Great with your morning cup of coffee!

Apple Cinnamon Muffins
Stir together:
2 Cups Muffin Mix
1/2 Cup Applesauce
1 1/4 Cup Water
1 Small Apple, Diced (or 1/2 a large one)
1 teaspoon Cinnamon
Broken Walnuts to taste (or another favorite add-in, such as raisins or dates)

Fill oiled muffin  cups. Top with Cinnamon Sugar or Streusel if desired,  and bake at 400degrees Fahrenheit for 25 to 35 minutes.

Streusel
2 Tablespoons Brown Sugar
1 Tablespoon Mix
Chopped Walnuts
(a little fat such as Vegan Buttery Spread or oil may be added for a richer streusel)


Friday, January 25, 2013

Simply Vegan Pizza

Vegan Pizza, fresh from the oven.
I love Pizza - it's one of my daughter's favorites, too. We enjoy homemade Pizza whenever we want, for a fraction of the price of the stuff at a Pizza Place- and it tastes much, much better! And, I can get to decide what goes in it - down to the last pinch of salt! Best of all, it's super quick, and FUN to make. My little daughter can even enjoy making her own (all but the oven part).

I don't eat cheese - and I really don't like fake cheese, either (tho I have tried ONE good kind in Europe, unfortunately I don't even know the brand of that one).

So, I just leave it off. And, wonder of wonders - the pizza tastes better than it tasted with cheese!

Vegan Pizza.
Press/Roll out one pound of homemade dough (you may use store bought if you prefer, but this is better and only takes 5 minutes hands on time - I ALWAYS have some in the fridge : )

Put the rolled out dough on your best pizza pan. My favorite is a Perforated, Non-stick model that turns out a perfect crust. (I usually spray it with a little Oil).

Add Sauce from your freezer - thawed, of course. If you prefer, you can use store bought "Pizza Sauce" or make your own Pizza Sauce by stirring together one Jar of Spaghetti Sauce (usually about 3 cups/ 24 ounces) with one can (6 ounces) Tomato Paste - and season to taste if you wish.

Top with your favorite toppings - edge-to-edge so almost no sauce shows. My favorites are sliced black (California) olives, Green Olives, Capers, Chopped Bell Peppers - any color, thinly sliced onion, mushroom, eggplant - you get the idea.

Bake on the Middle shelf of your oven at 450 degrees Fahrenheit, till edges are slightly browned. This takes about 14 to 18 minutes. (If you're baking two at once, which I often do, you can put one on the bottom shelf, and then halfway through baking time, switch the middle one to the bottom shelf, and visa-versa.)

Slide onto another pan to cut (so you don't ruin your best pan), slice and enjoy!

I sometimes like to top a slice - after baking - with a slice of Avocado - the way they sometimes do it in Africa : )

Serve with a Nice Salad and your favorite beverage.

Vegan pizzas are less heavy than Omnivore Pizzas, so each person may like a slice or two more than they would normally eat.


Vegan Pizza just before baking.
Tip for dining with Omnivores: I think you know how to do this one! Add some Mozzarella Cheese, a Sprinkle of Parmesan and your dining companion's favorite meat toppings to his or her pizza. Baking time is the same.


Thursday, January 24, 2013

Fill your Own Tortilla Night ( Black Bean Burritos )


Tortilla Buffet to accommodate lots of special diets.
This is a great meal to serve when you need to please a lot of different palates - or accommodate more than one allergy or special diet. This meal can be made gluten-free, dairy-free, soy-free, sugar-free, vegan, or - for that matter - Low Carb, Paleo or Atkins (!) - not that I recommend it - but you can't always choose your friends' or families' diets. Each diner customizes his or her plate to taste. It is a delicious family-friendly, and budget-friendly meal that seems to please everyone - but is also quick and easy to prepare. It's great for informal, friendly gatherings - and can be made for a crowd, if need be.

Simple Black Beans
Combine all in pot, simmer till blended and sauce thickens a little, 10-20 minutes
1 bag (12 oz) frozen pepper & onions * 
4 cloves garlic, minced
3 cans (15.5 oz each) black beans, drained, or 4 1/2 cups home-prepared
1 can chopped tomatoes, with juice
1 Tablespoon Taco Seasoning (more or less to taste) **
Water as needed - usually 1/2 cup to 1 cup - shouldn't be soupy- only a little saucy for covering rice.

Serve with: cooked rice, tortillas, shredded lettuce, tomatoes, salsa, hot sauce - etc - see below.

* In place of bag of frozen Peppers & Onions, you may use one diced onion and one diced bell pepper. If you're using fresh, you may saute them till they're tender before adding other ingredients - but that's not necessary if you use frozen.

Vegan Black Bean Burrito
** Instead of Taco Seasoning, you may substitute: 11⁄2 tsp ground cumin, 1 tsp dried oregano, 1 tsp smoked or regular paprika, ¼ tsp pepper - and, if you prefer to use store bought to homemade Taco Seasoning, that is fine, too.

Make a meal by setting out whichever of the following suit your diners:

Tortilla Buffet
Simple Black Beans
Rice (I understand the low-carb folk like a fake  Rice made from Cauliflower)
Wheat Tortillas
Corn Tortillas (for the Gluten-free folk)
Shredded Lettuce of your choice
Diced Tomato
Diced Avocado
Salsa
For the Omnivores & Lacto-Ovo Crowd:
Taco-Seasoned Ground Beef
Diced, Grilled Chicken
Shredded "Mexican" or Cheddar Cheese
Sour Cream

And, for Everyone, Baked Tortilla Chips and Salsa

I'm sharing this on Kids in the Kitchen, Everyday Entrees for Around $5., 
Kid Friendly Meals


Wednesday, January 23, 2013

Tofu Creole & Vegan Worcestershire Sauce

Tofu Creole
Many years ago, back when I was an Omnivore, one of my favorite dishes was Shrimp Creole. When I gave up meat, I have to say that I never missed the taste of meat much - but I did miss the flavours of this dish.

A couple of years ago, I decided to make Shrimp Creole for my husband - and serendipitously created this vegan version in the process!

Tofu Creole
Saute to tenderize veggies
4 Ribs Celery, chopped
To saute tofu, cut extra firm or Chinese style Tofu
 in dice-type cubes, and brown it
in a tiny bit of oil (less than a teaspoon), tossing occasionally
to brown all sides to a light golden color.
2 Green Bell Peppers, chopped
Add
6 cups Yachni
2 teaspoons Sugar
1 1/2 teaspoons Chili Powder Blend **
2 Tablespoons Vegan Worcestershire Sauce*
Simmer Briefly
(At this point - the dish can be frozen for later use, if desired)
This is also delicious just served plain over rice, with no Tofu or Shrimp added - that's the way my Mom liked it.
Add Sauteed Tofu, and serve over rice.

Tip for dining with Omnivores: Divide sauce into individual portions, and add thawed, precooked shrimp to Omnivore's portion.


* If you cannot find or do not wish to buy this product in the store,
here is a recipe adapted from one of Jo Stepaniak - I believe it was
in her book Ecological Cooking.

Vegan Worcestershire Sauce
4 Tablespoons Soy Sauce
6 Tablespoons Water
2 Tablespoons Cider Vinegar
6 Tablespoons Maple Syrup (you may substitute Agave or, if you use it, Honey)
1 teaspoons Molasses (blackstrap if possible, but any kind will work)
1 teaspoon Ginger Powder
½ teaspoon Garlic Powder
1/8 teaspoon Cayenne
Tiny pinch Cloves
Tiny pinch Onion Powder
Shake in jar, refrigerate – keeps well.

**Chili Powder here is the American Spice Blend, not Ground Chilies. See Post on Taco Seasoning for more details, or for a substitute.

Tuesday, January 22, 2013

Simply Sushi

Sushi for One. Turn your head to the right to view-
Blogger rotated my picture & I can't rotate it back ; )
For years, I've been intimidated by the idea of making Sushi. After all, training for an Itamae (Sushi Chef) can take years - if not decades!

On the other hand, I've read that a lot of Japanese Moms make Sushi for their children's lunchboxes. I don't think they're ALL training for decades to do that job.

The year we married, we had a nice little restaurant we went to that served Avocado Sushi. It became a favorite of mine. This Sushi tastes exactly like that one did.

If you'd like to have your vegan Sushi tonight (and not in a decade ; ) this is the post for you! It may not produce a gourmet Sushi by Japanese Fine Dining standards, but I find it indistinguishable from the Vegetable Sushi rolls I have tried here in America - but A LOT cheaper - and quick & easy, too! It can be made with as little as 4 ingredients (depending on what filling(s) you like).

This recipe makes two rolls (about 10 to 12 pieces) - if you want more, increase the proportions.

At a Grocery Store- this plate of Sushi will run you about $12. At home, about $1.40 at retail prices(assuming you didn't find any great sales)

Simply Sushi
First, Cook a pot of Short Grain or Sushi Rice. *

Remove two cups of cooked rice, and drizzle it with
1 Tablespoon Seasoned Rice Vinegar**


Nori with the Seasoned Rice & Avocado all ready to roll.
Gently toss the rice & vinegar mixture a few times, to allow all of it to cool to room temperature.
(Gently means that you're not trying to make the rice into mashed potatoes - don't smoosh it ; ) Lift it up and turn it over with a fork - or if you want to be really fancy - with a wooden implement for rice.

Lay out two sheets of Toasted Nori (it comes pre-toasted in the package - no need to toast your own), shiny side down/bumpy side up.

Using a fork, spread the rice over the Nori - spread it all the way to the sides, but leave a 1/2" border at the top and bottom (The edges nearest and furthest from you).

Along the bottom edge of the rice (nearest to you) put strips of filling. My personal favorite is Avocado - but Cucumber, Carrots or other veggies are also great. Strips are better than diced - they stay put better.


All rolled up and ready to cut.
Dry your hands if they are wet. (Some people like to use wet hands to work with rice, but dry hands to work with Nori. I prefer to use a fork with my rice - solves the whole problem.)

Begin rolling at the bottom edge, and firmly (squeezing just a tiny bit - not so much as to tear the Nori) roll it up. Most professionals use a little bamboo mat for this job, but I find it quite easy to do with just my hands. If I made Sushi all day every day, I'm sure I'd buy one of those little mats.

Allow to stand for a minute or two, and slice with a steak knife (which is to say, a very sharp, serrated knife).

Arrange it on the serving plate, and serve with a little container of soy sauce for dipping.


Sushi on a plate. Enjoy! (of course, you'll want to arrange yours
prettily on a fancy dish : )
If you like, you can get fancy and add Wasabi Paste & Pickled Ginger.

* Rice - I cheat. I keep prepared Short Grain Rice in my freezer, and heat it thoroughly as needed in the microwave. I know gourmets look down on this, but I'm also pretty sure that almost no one can tell the difference in a blind taste-test. If I run out of the frozen stuff, THEN I make fresh.

** If you cannot find Seasoned Rice Vinegar, you can make your own substitute with  3 Tablespoons white rice vinegar plus 1 Tablespoon sugar plus 1/2  teaspoon salt. 


For more information on making Sushi, check out this great website.

This is also being shared on Frugal Tuesday Tip


Monday, January 21, 2013

Hummus with Capers

Hummus Appetizers before Sunday Dinner.
Hummus recipes are all over the place - there's apparently a rule that every vegan cookbook or blog must have a hummus recipe. This one is different for a couple of reasons 1) It's oil-free, but doesn't taste that way - it's creamy & rich and 2) The flavour is extra nice because of the added capers. It takes less than ten minutes to make, and will save you lots of money (and health) compared with high-oil store bought.

Here's the scoop.


Hummus with Capers 
Process in food processor till smooth, then process for a while longer. Then process a little longer. Then process a little longer . . . .
1 can (15 oz) drained chickpeas, or 1 1/2 cups home-cooked chickpeas
2 T Lemon juice
1/2 tsp salt
1/3 tsp Paprika
1 ½ tsp fresh garlic
2  to 4 Tablespoons tahini (the more the richer/thicker)*
½ cup Oil Substitute (1/2 cup water, 1 tsp tapioca, bring to a boil in microwave, stirring every 30 seconds, or on stove top, stirring constantly)**
Then, add and pulse briefly in the food processor:
1 1/2 T Caper buds with some brine *
Taste, and adjust flavors as needed.
Chill and serve.
Freezes well. You can make small containers to add to lunchboxes & store them in the freezer, or larger containers of hummus to have on hand for home use.

**Edited to add: If you prefer, instead of oil substitute you can use 2 teaspoons of Olive Oil, and add additional water while blending/processing to make hummus your desired consistency. This still keeps oil usage minimal, and might be more convenient in some situations.

Split, homemade Naan or Pita, toasted and  filled with Hummus and Tomatoes is a
lovely lunch or late evening snack.


*Tahini can be quite pricey at the grocery, but at my local ethnic store, it costs only 30% more than peanut butter. Shop around for a good price. Likewise, Capers are MUCH cheaper when purchased at an ethnic shop.

Put everything but Capers in the food processor and process, process, process.

Add Capers and pulse briefly.

Oil Substitute - 1 teaspoon tapioca starch boiled with 1/2 cup water.


Saturday, January 19, 2013

Vegan Strawberry Pancakes from your own mix ( Or Vegan Blueberry Pancakes )

Vegan Strawberry Pancakes
 
On Saturday mornings, it's nice to have pancakes. We often opt for Blueberry Pancakes. In the winter,  I usually keep a bag of Frozen Blueberries from Aldi in the fridge and can easily throw in a handful of frozen berries into the batter for Blueberry Pancakes. In the summer, I use fresh berries if that makes more financial sense.

But, today I went to the freezer and discovered NO BLUEBERRIES!

So, I reached into the bag of Frozen Strawberries, rinsed them in warm water for a minute or two to soften them, and diced them - and tossed them into the batter.

They were quite lovely!

Storebought frozen Strawberries are a little tart - if you like sweeter ones you can use fresh, or sweeten them a bit before adding - or add a spoon of sugar to the batter - however you like them, they're delightful.

If you don't already have some of your own, homemade Vegan Pancake Mix on hand, here's the recipe.

From there, it's a simple matter of mixing in water or nondairy milk until it is the proper texture (use 1 cup mix to 1 cup liquid, and add a little more of one or the other if it isn't quite thick or thin enough - it should be pourable, but not watery). Then mix in your blueberries or strawberries - and you're off!

Some chopped Pecans would also go well in the Strawberry Pancakes.

Serve with Vegan buttery spread & syrup, if desired. (I like mine plain - with the fruit added I think they're perfect as-is)

Tip for dining with Omnivores: a bit of Whipped Cream would go well with these. And of course, they fit the traditional Omnivore breakfast with Eggs and Bacon or Sausage.

Friday, January 18, 2013

Eggplant Stew

Eggplant Stew
This is a tasty stew that can be eaten from a bowl, with bread, or over polenta, rice or your favorite grain. It's easy to make in the Slow cooker, and great for you!

Eggplant Stew
1 bag 3 Pepper & Onion mix (or 1 pepper, chopped)
2 (4 oz) cans  Sliced Mushrooms
Add to slow cooker with
1 cubed Eggplant, in 1/2" dice (unpeeled) *
3 cups Vat O' Spaghetti Sauce OR 1 (26 oz) jar purchased Spaghetti Sauce
1 can (or 1 1/2 cups) Chickpeas, drained
1 – 2 tsp dried rosemary
1 teaspoon Italian Seasoning Blend
Generous dashes of parsley
Main Ingredients for Eggplant Stew.
Note the Homemade Spaghetti Sauce & Chickpeas from the
Freezer for a frugal, homemade dish.
Stir in (I added this before reheating if making this dish for the freezer, or shortly before serving if serving right away)
¼ cup capers, with some brine to sufficient saltiness (or a handful of Green or Kalamata Olives)
Serve with Rice or other grain, or Polenta or Crusty Bread & Salad. I believe it would even be good over sliced or baked potatoes : )

Leftovers make good vegan pizza topping!

Cook on High in Slow Cooker or Crock Pot for 5 hours. Vegetables will release some moisture, making stew have more liquid than one might think - but if mixture is very dry at the outset, stir in a little water.
*  American Eggplants are big - about 1 pound each. If you're using small Eggplants, use about 1 pound or 1/2 Kilo.

This dish freezes very well - in fact it's one of those dishes that really IS better after freezing or "the next day."

Tip for dining with Omnivores: This could have a bit of grilled meat or fish added as a "side dish." The flavours of this dish are compatible with cheeses we think of as "Italian" - Mozzarella or Parmesan/Romano. Those Cheeses should be good melted over the top for those who wish.

Thursday, January 17, 2013

Chili Cornbread Casserole & Vegan Cornbread Mix

Chili Cornbread Casserole
I'd like to say that my Chili was the Chili Cook off winner at Church this year. Or any year. But, it wasn't ; )

This is Chili the way I like it. Very fresh tasting & vegetable-y. Not a trace of fake meat in sight. There are a million other Chili recipes out there- if this one isn't to your taste, you can substitute your favorite Chili to make this dish.

This (or any) Chili is good baked under a layer of cornbread, ladled over a baked potato, or as a topping for spaghetti noodles.

I give a Cornbread Mix recipe below, but if you prefer, you can always use a store bought mix & prepare it according to package directions.


Chili 

Saute
Fill Oiled dish about 1/2 full with Chili. (If you have some
leftover, freeze it for lunches or for another dinner!)
 
optional -1 T oil
1 (12oz) bag 3 pepper & onion blend or 1 chopped onion, 1chopped green peppers
1 tsp fresh garlic
Add
1 (15 oz) can rinsed Kidney beans *
1 (15 oz) can rinsed Black beans *
1 (15 oz) can rinsed Chickpeas *
3 (15oz) cans chopped tomatoes, with juice
2 cups frozen Corn, rinsed in a sieve to thaw
3 T Taco Seasoning **
***Optional "heat"
Evenly top with spoonfuls of cornbread batter. (don't add
at one end of dish hoping to spread it all over )
Simmer, covered, 30 min over low heat, stir occasionally, serve with cornbread (or top with cornbread batter and bake according to cornbread directions - see below)

If desired, all ingredients can be simmered in Crock Pot or Slow Cooker on high for about 3 hours, instead of cooking on the stove top.
 
 
** In place of Taco Seasoning, you may use ALL of the following: 3 T chili powder blend,
1 tsp oregano, 1 T cumin (whole or ground). Chili Powder Blend here is not Powdered Chilies, but rather the popular spice blend. See post on Taco Seasoning Mix for more details.

Spread evenly with the back of a spoon.
Alternate uses: serve over spaghetti, or over baked potatoes

***For a little "heat," 3 very finely minced Thai pickled peppers can be used - it's fine to add them at reheating time.
 
 
Tip for Dining with Omnivores: You can always use a purchased Chili Con Carne for the Omnivore's portion. Alternately, you can use cooked ground meat for a garnish and let it be stirred in at the table. Many Omnivores also like Shredded Cheddar or Sour Cream with their Chili.
 
Vegan Cornbread Mix:
Bake till golden brown.
May be used for Chili Cornbread Casserole, or to make Cornbread or Corn Muffins.
Combine in Canister & shake well:
3 cups Unbleached Flour
3 cups Cornmeal (similar to polenta)
1/2 cup Sugar (may be reduced or omitted - depending how sweet you like your cornbread)
3 T Baking Powder
1/4 c Arrowroot Powder, Tapioca Starch or Cornstarch
Scant Tablespoon Salt
To use:
2 c mix
1 c water
Canister of Vegan Cornbread Mix
1/2 cup Applesauce OR 3 Tablespoons oil


Bake in greased pan, 425 deg. 25 to 30 min (or top chili and bake the same way). Also may be used to make muffins - baking time may be *slightly* less for muffins.

This is being Shared at
Mums Make Lists Empty Your Archive

Wednesday, January 16, 2013

How to Cook Rice

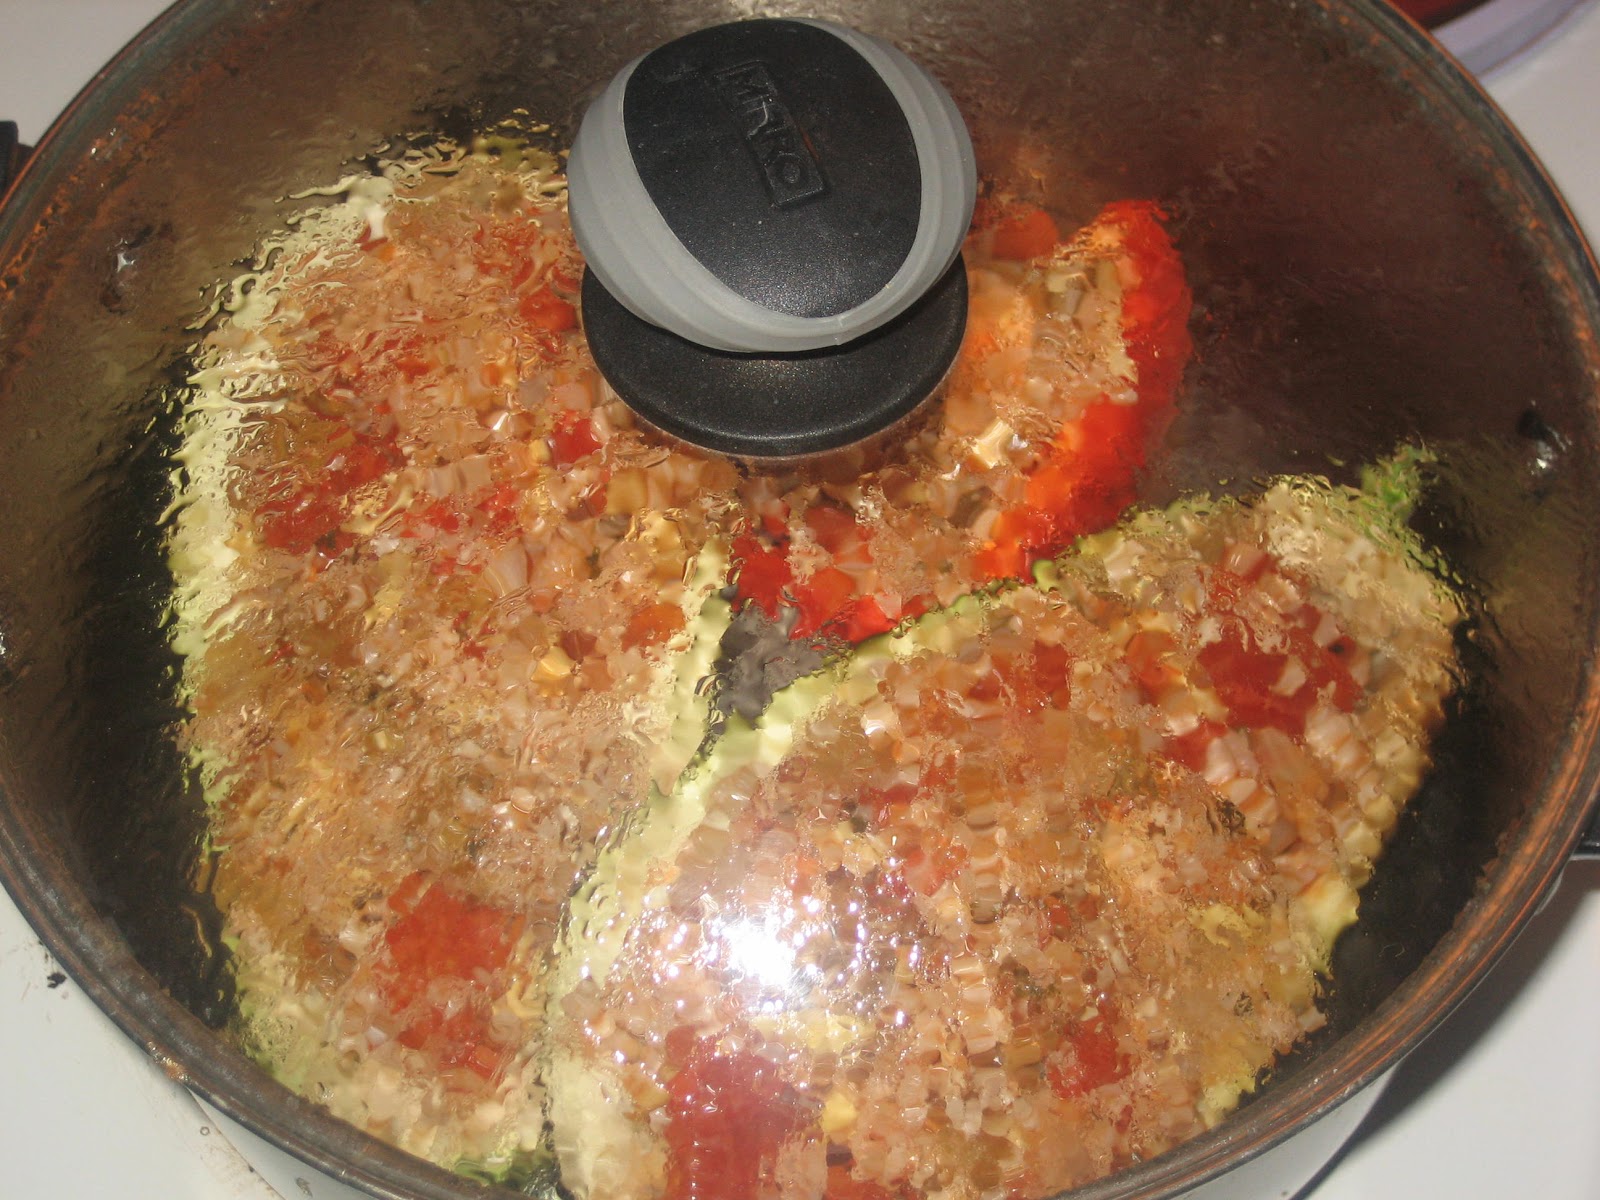
Rice as it's beginning to simmer.
When I was young, I spent a number of years in Asia. One day, I asked an Asian friend who cooked professionally to instruct me how to make rice. When she was able to stop laughing enough to catch her breath, she very kindly taught me "how it's done."

Now, I realize that some of the people reading this post will think, like my friend did, that the whole discussion is ridiculously silly - everyone can make rice! But, I find that A LOT of Americans tell me they avoid making rice because it always turns out "mushy" or for some other reason they find cooking it daunting. This post is for you!

First you must choose your rice. According to the children's book, "All About Grains" by Vic Parker - which I read to my daughter last week - there are 40,000 types of rice grown around the world. I usually keep 3 or 4 kinds in my kitchen. Here they are with short, vaguely accurate stereotypes of how you might think of them:

1. Long Grain White (American Everyday Rice), Long Grain White Rice is THE rice to cook if you want standard American Rice. When cooked properly, you get a tender, fluffy, non-sticky grain. I'm not a big fan of it, except in select situations. It is good for Pilafs and Soups.

2. Short Grain White (East Asian Rice), this is my hands-down favorite for eating straight from the pot, snacking, and all-round rice enjoyment. It is a typically sweeter, chewier, stickier grain than is Long Grain Rice. I usually buy the "Calrose" variety. Sometimes, in American groceries it is not in the rice section! It may be in the ethnic section at your grocery, or in some towns you may even have to go to an Ethnic shop to buy it. It is easiest to pick up with chopsticks. Although technically Sushi rice is different from Short Grain White, I find Short Grain White a quite nice substitute for making an everyday Sushi (after all, I'm a home cook, not a Sushi Chef!).

3. Basmati (South Asian Rice) is extra fluffy & tender and long grained. It is drier than Short Grain or Long Grain Rice, fluffier, less sweet - and smells like Popcorn when it cooks! It is the normal rice to pair with Indian food, and is generally considered a "better" rice by Indians and some American Gourmets. There are lots of varieties of Basmati Rice, so if this is a favorite variety of yours, it is worth investigating the differences.

4. Long Grain Brown (American Health Nut Rice ; ).  This is a chewier, nuttier, healthier rice than it's companion, Long Grain White. It is a whole grain,  good for a bed under beans, in Rice Salad, or in a Rice Bowl or Rice Breakfast Bowl.

Each of these varieties may be made on the stove top or in the microwave. The three White varieties are all made similarly. The Brown variety requires a different method, and a longer cooking time.

White Rice on the Stove Top
This is the method for Short Grain White, Long Grain White, or Basmati

Grab a 2 quart pot and pour desired amount of rice into your pot. (usually  1 1/2 to 2 cups to start - a little less than 1" in the bottom of the pot- huge quantities of rice are more prone to gumminess, and require specialized instructions. But, you really don't need to measure anything here).

Rice and Water are the ONLY ingredients that should be in the pot. No butter, lard, margarine, bacon, salt, soy sauce or anything else is needed to make great rice. Just rice and water.

Rice may be rinsed or not, according to your preference. Rinsing removes added vitamins, and causes a less-sticky grain. Not rinsing preserves stickiness, and vitamins.

Checking the depth of the water so rice & water
are properly proportioned.
Add water till the water is twice as high as the rice. Put your index finger down into the rice, the rice should be half as high on your finger as the water is.

Set the pot with Rice and Water on a burner set to high. Bring water to a boil. At this point, you may stir once, if you really must.

Reduce heat and cover. The heat should be JUST ENOUGH to gently simmer the water, with the faintest wisp of steam rising from the edge of the lid. Since the water may foam at first, you might want to stand over the pot for a couple of minutes to make sure it is producing that tiny wisp of steam and neither boils over nor stops simmering. Too much heat will boil the water away too rapidly, and cause the bottom of the rice to scorch (as will too little water).

Leave the pot lid on! Do not lift, do not peek, do not stir for 20 minutes. (Basmati Rice cooks in 15 rather than 20 minutes). Set the timer. Resist the temptation to look. Really. ; )

When the timer goes off, do NOT lift the lid & peak, or stir, or look. Remove the pot from the burner, and set the timer for 10 more minutes. When we call white rice "steamed" - this is what is meant. These 10 minutes are when the rice is steaming.

Finally, after the 10 minutes, lift the pot lid and delicately "fluff" the rice with a fork. The rice may well be moist at this point. Allow the top to dry for a few minutes, and fluff again.

It is now ready to serve : )

White Rice in the Microwave
Microwave rice cooker on a plate, ready to cook.
Use a Microwave Rice cooker, or a large microwave-safe glass bowl with high sides covered by a microwavable dinner plate.

Measure into your cooker 3 cups white rice, and
 3 3/4 cups water. Cover.

Place on a deep plate in your microwave (if the liquid boils over a tiny bit, which it sometimes does, the plate will catch it).

Cook on high for 16 to 17 minutes.  (Here I use the same cooking time for White or Basmati White Rice)

Allow to stand covered 10 minutes more before removing cover and fluffing with a fork - as above.

Brown Rice on the Stove Top
Follow the directions for White Rice, EXCEPT
Measure into Pot 2 cups Brown Rice, 3 cups Water.
Cook for 40 minutes, and leave covered for 10 more.
This produces a perfect, chewy, non-mushy brown rice.

Brown Rice in the Microwave
Follow the directions for White Rice in the Microwave EXCEPT
Use 1 Pound bag (or 2 1/2 cups) Brown Rice and 4 1/4 cups water
Microwave on High for 30 minutes, and leave covered for 10 minutes more.

That's it!

OH- If you have leftovers (or want to cook rice ahead), store in the Freezer. For some reason, refrigerated rice tends to get hard and stale, while frozen rice stays fresh (I don't understand it, I've just observed it for more than 20 years now). Just reheat with a lid, and you'll have trouble telling that it wasn't freshly made.

Enjoy! : )